Earth Heart Holistic
  • www.glittermouse.co.uk
  • Earth Heart About
  • Earth Heart Blog

Onion Squash Scramble... and the Dance of Light and Dark!

31/10/2024

0 Comments

 
I might not have posted quite as many seasonal recipes this year as I'd have liked but there's absolutely no way I could let pumpkin season slip by without sharing A) my favourite kind of squash and B) my favourite thing to do with my favourite kind of squash, a recip(ish) that I invented last year and we've been eagerly awaiting the harvest to recreate... 
It seems especially appropriate to share a pumpkin themed recipe today too; calendar Samhain (Lunar Samhain is tomorrow), perhaps more commonly known as Hallowe'en or All Hallows Eve, heralding the arrival of All Saint's Day or in certain parts of the world, Día de los Muertos. I shall let you do your own research on those festivals if you want historical, anthropologic or theological accuracy but I'll happily share my own take on it and why it feels important to mark in some way; Samhain (pronounced 'saowain') is a Celtic Pagan fire festival which I believe is fairly authentically ancient. The name translates to 'summer's end' in Gaelic at the point of transition from the lighter to the darker days.
​
Samhain Shrine
Samhain Shrine
A Samhain/Diwali Shrine...
Light and Dark
The last festival was Autumn Equinox, when we saw a balance in the length of night and day but it's unlikely to have escaped the attention of many that we're now experiencing more darkness than daylight. This is the time of year when the trees embody that wonderful dance of dying whilst being at their most abundant, teaching those who would learn that true riches aren't found in clinging, demonstrating the grace and beauty of releasing that which has served its purpose and allowing even their precious fruits to be recycled back into the earth from which they were nurtured, to prepare for and nourish the new year's growth. But first... The darkness. And of course the trees know full well the importance of darkness, half their very bodies live an entire life in the dark, rooting down to places where the light is not welcome.

And we need the darkness too, just as much as we need the light. From the darkness we are gifted rest, reflection, recovery. So there's a reason this time of year is the time we are invited to pause and consider those we have lost, gifts of life we have been called to return to the darkness. It's a time I like to especially call to mind people in my life who have died, to reflect with gratitude on all they brought to enrich my life and practice accepting their death, as well as the inevitably that I shall one day be following in their footsteps. That's not always comfortable, but it feels like an important way of becoming a bit more honest about being alive. 
I often think that if we could learn to be a little more comfortable with death, we might find life a little more comfortable too. So whether or not you believe that the veil between the worlds is at its thinnest tonight, I think it's a pretty appropriate time to listen to the voices of those we outlive, be they ancestors, family, friends or strangers for that matter.
​Life is not forever and what you do with it matters.
But hang on. Isn't this the precursor to a recipe? What about the pumpkins?! Why is it relevant to share a pumpkin recipe today? Well, of course it's completely seasonally appropriate and the folklore linking carved vegetables to this festival also goes back a long way (I'll let you research that yourself too) but of all the fruits (yes, it's a fruit) that demonstrate life and vigour springing from death, I can't help thinking the pumpkin really is the crown prince. Pumpkins and squash absolutely thrive on a huge, great, metaphorically steaming piles of well rotten compost. They take last years dead stuff and grow rampantly on it, trumpeting their presence with great, sunny flowers and climbing all over the garden with their curious tendrils. 
Samhain Shrine
...Life and Death, Darkness and Light
I really don't think I can imagine a plant that is more dynamic, abundant or alive, which makes them completely, perfectly symbolic for a festival which turns to look at death because you can't have one without the other. There is no death with out life. There is no darkness without light... So probably no coincidence then that Diwali, the Hindu festival of light, is also celebrated at this time. Two sides of the same coin.
Onion Squash
Uchiki Kuri or Onion Squash

​So, now that the preamble is all cleared up, may I have the pleasure of introducing the Uchiki Kuri, also known as Onion Squash? It's conveniently easy to grow, usefully sized for an average meal portion, doesn't require a power tool to penetrate, stores well (easily for three or more months), cooks quickly and tastes completely delicious. How marvellous! And better still, I have discovered a totally delectable thing to do with it! Though I would never advise anything other than a simple roasting was necessary to enjoy this sumptuous squash, it happens to scramble really well with tofu. 
​
Now, I am extremely reluctant to compare plant to animal based foods. Firstly, whilst I have no desire to convince or convert anyone to anything, there's something about the idea that 'if only vegetables tasted as nice as meat, omnivores would put the steak knife down' that seems to rather miss the point. Secondly, there's no better way of cultivating disappointment than raising expectation. So, those are the reasons that I'm not going to assert that this is like scrambled eggs. It's not like scrambled eggs. 
But... If for whatever reason you had chosen to follow a plant based diet and it was quite a long time, like maybe a decade or more, since you'd eaten scrambled eggs, the chances are you'd eat this and go 'Oh, that's quite eggy' in a way you probably wouldn't if you just ate scrambled tofu. There's something about the rich, thick yellowness of the Onion Squash flesh that's just quite yolky (as I recall), which is the element I always found lacking whenever someone told me 'try this scrambled tofu, it's just like eggs!' and that is what gave me the idea to create this scrambly squashy tofuy meal, whether or not you think it tastes like anything else. You could use other squashes but my experiments haven't found a variety that does the job like this one, so set aside the watery, fibrous old butternut and seek the tender pleasure of the Uchiki Kuri, you won't regret it!

Scrambled Onion Squash with Smoky Tofu

You'll need:
  • 1 average sized Onion Squash
  • 1 pack of smoked tofu (Plain is fine, smoked is tastier!) 
  • A knob (or three!) of plant butter (I use Flora) 
  • Unsweetened soya milk (oat would probably be OK) 
  • Salt (sulphurous Himalayan black salt gives an extra eggy hint if you want that) 
  • Freshly ground black pepper
  • ​Chopped parsley (or whatever fresh herb you have!)
Though it's quite quick to make the actual scramble, it really helps to have the squash precooked, so I try and get one in the oven when I've got it on for something else. Simply slice it in half and pop it in (you can use oil if you like but you don't really need to), anywhere between 180°c and 220°c for 40 to 30 minutes or so, respectively. Cooking time will depend a bit on the size of the squash, of course.

When it's cool, gently tease the seedy mesh from the centre (take them out before roasting if you want to plant them in the spring!) and then scoop the flesh from the skins. The skins are really worth keeping, they make a delicious crispy, chewy snack if you cut them into strips and bake them further, or a tasty container for seasoned lentils, a bit like stuffed peppers but crispier. The cooked flesh (and skins, for that matter) will keep well in the refrigerator for a few days so it makes sense to get ahead on that if you can, especially if you want this meal earlier in the day (we enjoy it as a weekend brunch!).
​

When you're ready to make the scramble (actually, you can prepare this bit in advance too), break the tofu into chunks and gently mash it in a large bowl with the squash flesh, salt, pepper, parsley and enough soya milk to allow the squash and tofu to mix well, maybe half a cup.

Melt the plant butter in a large frying pan and add the milky squashy tofu mixture to the hot, melted fat. Cook it, stirring fairly regularly until it starts to reduce down a bit and get to a consistency you like. You can always add more milk if it seems dry or starts sticking.

​​
Serve on hot, buttery toast with all the trimmings; mushrooms, tomatoes and wilted chard (home grown, of course!) are especially good companions! 
I suggest feasting upon this seasonal treat whilst reflecting upon how good it is to be alive to enjoy it (and maybe being quietly grateful for everyone else who had to be alive in order for you be here to do that!) May your long autumn nights be cosy and quiet, may this time of letting go release you from burdens and may you find the time to rest, renew and restore in the darkness.
0 Comments

Beetroot and Cacao Brownies

16/8/2024

0 Comments

 
It has not escaped me that since launching a small baking start-up, I've had no time to share any recipes! Oh, the irony! When I first started writing this blog at the beginning of the year I was having to pace myself a bit and hold back from posting something or other from the kitchen pretty much everyday. Still, the sabbatical is over and I always knew that once the Earth Heart project was underway there would have to be a shift of priorities!

Seasonal is as important to us as homegrown organic, though of course the two go hand in hand. You might think baking is all about sugar, flour and butter (or plant based alternative, of course!) but happily even cakes can enjoy a seasonal home grown twist. Fruit might be a fairly obvious bed fellow of sweet teatime treats and perhaps carrot cake is a relatively well known example of how vegetables can get in on the picture but it needn't stop there!
Freshly Harvested
Organic Beetroot
Forever Cacao

​Here is my first recipe that ticks the all the seasonal, homegrown, organic vegetable boxes and that is also all about the baking! Please give a warm welcome to Beetroot and Cacao Brownies! We've had a bit of a beetroot glut over recent weeks, if the word 'glut' isn't too ungrateful a sentiment to apply to these ruby globes of earthy nourishment! Perhaps 'abundance of beetroot' might be a more appropriate way to describe the quantity of delightful rosy tubers that have been bursting their way onto our plates like the vibrant, nutritional powerhouses that they are! But... we can only sell so many of what we can't eat. I've roasted, grated, sliced and fried and I fancied doing something else with them. Back in another life, I drank small shot bottles of beetroot juice before races as they were being marketed to runners as naturally performance enhancing super foods. I don't know if they improved my finish times at all. I've recently decided I prefer them in brownies. What a delightfully unexpected parternership it is too; the deep, rich, earthy musk of beetroot entwined with the soothing, gentle uplift of pure cacao! It's practically a health food, honest. It'll certainly make you feel better!


I'm being very specific about the cacao in this recipe. Of course you could use cocoa powder or a bakers' confectionery bar. I would have done once, until I was lead to the magical dance of high quality cacao very literally on one random full moon Friday night in Shrewsbury, thanks only to a newsletter that my predecessor must have signed up to receive to her work email! It was my discovery of Forever Cacao Club, the monthly event held by Forever Cacao, a small, artisan chocolate company who have a direct and highly responsible trade relationship with the Ashaninka community in Peru who in turn harvest, ferment and dry the wild grown, organic cacao that is then shipped to a small Welsh village (not very far from us at all), for alchemising into pure, ceremonial grade cacao and award winning chocolate bars. Cacao Club was the first time I'd found a regular place to go sober dancing since I stopped drinking every weekend after losing one of my best mates to alcoholism. That the (highly unpretentious) ritual evening began with a meditative cup of freshly brewed cacao before launching into a few hours of dancing courtesy of the accomplished and inspired resident DJ Pablo (who also just so happens to make the cacao) was an unrestrained delight and Cacao Club became a singular highlight of my month for quite some time. 
I know, cocoa powder was good enough for your gran and we're all on a budget. There are all sorts of ingredients I have to compromise on if I'm going to produce something that comes in at less than £8 a slice but now I've met actual cacao, there's really no going back. You are, of course entirely free to make this recipe with whatsoever chocolatiness you choose... but I shan't be held responsible for the consequences!!

It might be considered fool hardy or even reckless to invent a new recipe the day before you intend to sell the product but I like a challenge. Most of my bakes are the result of many batches of tweaking, tasting, trial and error, grumbles, sighs and plenty of that annoying thing people do when they serve you something they've cooked then proceed to tell you about all the ways they're unsatisfied with it . No doubt I shall go on to further refine this recipe but I was so happy with these fudgy little burgandy beauties that I thought I'd make up for my recent recipe dirth and share it to celebrate my first pop up bakery tomorrow! (at Dragons Craft Shop in Llanrhaeadr-ym-Mochnant from 10am to 5pm incidentally...)

I realise I've previously said I never really follow a recipe and that's true to an extent, but baking is a science as much as it is an art and you do have to be a bit more precise with a brownie than you do with a soup. Hence, instead of my usual, rambling 'recipish' here is an actual list of weights and measures along with an actual suggested method. But you know... Do whatever.

Organic Beetroot & Cacao Brownies


  • 125g Self Raising flour (gluten free is an option but reduce the liquid a bit, e.g. less liquid beetroot)
  • 40g Ground 100% Organic Cacao
  • 1 tsp Nutmeg
  • 140g Raw Organic Beetroot, (grated and boiled down until you have about 200g mushy mixture)
  • 100g Demerara Sugar
  • 100 ml Maple Syrup
  • 1 tsp Vanilla Extract
  • Pinch of sea salt​

​
  1. Preheat the oven to 180°C and line a baking tray with greaseproof paper. The one I use is about 25 x 23 cm or thereabouts! 
  2. Peel, grate and boil the beetroot. Don't use too much water. Just cover and boil until almost free of juice.
  3. Mix (you can blend but don't have to) the beetroot, maple syrup, and vanilla extract. If you're using a stick blender, use a low speed or stay well away from anything you think might stain!
  4. Mix the flour, cacao, nutmeg, salt and sugar in a large bowl and then gently fold in the beetroot. You may need to add a little more water at this point; but it will depend how wet your beetroot mix is. However much you decide to add (if any) add it slowly, a splash at a time. You can put it in but not take it out so easily! Ultimately you want a batter you can pour into your baking tin, not a lump as if you were making cookies but if it's too wet it'll never set. Good luck with that one. 
  5. Pour the batter into the prepared pan and pop it in the oven for around 30 minutes. If it's still obviously runny, it's not ready. If it starts burning on the outside whilst still slopping about like a flow of lava when you tilt the tray, turn the temperature down and adjust your temporal expectations! You can check when you think it's cooked by inserting a skewer or cocktail stick into the middle; if it comes out pretty much clean then you're good. Don't worry too much if it still seems very soft at this point. It will keep cooking it's own heat and will set further as it cools. 
  6. Allow it to cool thoroughly in the tin before turning it out onto a cooling rack (I'd use a sheet of greaseproof paper here too to manage sticking) and you might want to pop it in the refrigerator for an hour or so still more before you attempt slicing it.
It's worth mentioning that I updated this recipe after a bit of tweaking so the photos don't exactly​ match the instructions... but you get the idea! I get about 8 slices out of this bake. This is soft, gooey, fudgy, sticky, rich indulgence. But it's got some of your 'Five a Day' in it. Win/win. 
Beetroot and Cacao Brownie
0 Comments

A Midsummer Day's Feast

25/6/2024

0 Comments

 
It's not been uncommon in our kitchen over the last few weeks for Nik to appear at the door with a bundle of freshly picked broad beans to shell and stir into pretty much whatever I'm preparing, from salad to soup, kedgeree to curry. It's been a delicious trickle of home grown gorgeousness on our plates but it was time for the broad beans to move on and make way for the leeks, ready and waiting to take the stage. Now, the broad beans haven't enjoyed the wet spring and the cool start to summer any more than the rest of us and they've pretty variable in size from what you might expect to smaller than your average pea, but they've been no less tasty for their inconsistent stature even if they've been a little fiddly to get out of the pod at times! It was a pretty full morning of picking and shelling, towards the end of which Nik headed over to the other veg patch to fetch in some beetroot, a handful of small parsnips and a few baby fennel bulbs. Well, all that fresh produce kept me fully occupied while he got on with weeding the freed up bed and companion planting some brussel sprout seedlings around the lettuces. The Marvel and Little Gem lettuces are also starting to be past their best, though they've been as abundant as they've been succulent over the last month or so and I shall miss them when they're gone!

So what did I whip up in the kitchen, you may be wondering!? I'd already decided that when the time came I'd fall back on the trusty houmous template to celebrate all the joy of the broad beans and since beetroot and parsnip always speak to me of a big tray of herbed roast veg, that magical playmate of houmous, that was that pretty much sussed! I'm sure you don't need me to tell you how to roast veg but here's a quick rundown on the broad bean prep!
A Midsummer Day's Feast
Harvesting...

Broad Bean Houmous

Podding Beans
Houmous itself is a favourite for being so quick to prepare (that's assuming canned chickpeas of course) but I'm afraid this doesn't fall into quite the same category in terms of speedy prep time as I really do recommend double shelling the beans. It's the only time I'll do that and we normally enjoy them straight from the pod and still in their skins but to achieve a good, smooth texture for the dip, you'll need to invest the time in blanching and shelling them to reveal the juicy, pea like emerald jewel that nestles inside its little leather jacket. You might think that sounds like a bit of a chore but I'd merely encourage you to see it as an opportunity to practise a little mindfulness. A guided bean-shelling meditation would go something like: "connect with your breath, feel the connection with your feet on the kitchen tiles, notice the texture of the bean in your fingertips and the temperature of the blanching water. Now, when the time feels right, bring your awareness to the errant bean that you've accidentally placed in the pile of shed skins and wonder where your mind could possibly have drifted to..." Joking aside, I do find repetitive tasks like this quite useful for buying myself a little bit of 'checking in with myself' time during a busy day and I often reflect on how lucky I am that so much of my food has been made very conveniently available to me (back to that hand tin of chickpeas!)


Once you've got your beans double podded, things speed up a little. Add the juice of a lemon, a goodly glug of olive oil, salt, pepper and herb of your choice to taste. I used fennel today, since we'd harvested it for the bulb but coriander would work well as would any other softer leafed herb such as oregano, dill or parsley. Blend that all up and when you've got a sense of how thick that's turned out, you might consider adding a spoonful or two of tahini if you'd prefer it thicker. Tahini can be a touch on the bitter side, I find bit that can be remedied with a dab of good ol' apple and pear spread. Sorted!


Just as I was reflecting on how tasty the resulting meal would be with one, two, three, four (!) homegrown ingredients, Nik popped his head round the door and said "we really need to eat the artichokes!" so it was back to the veg prep bowl for yet another seasonal treat! Back when I had my allotment in London, I used to enjoy serving globe artichokes minimally prepared, simply trimmed a little, steamed and served with a classic dip of olive oil and balsamic vinegar. The excitment of being presented with that exotic single bloom to be manually destructed at the table and devoured in an oily fingered frenzy seemed decadent enough to qualify as a vegan version of a plateau de fruits de mer. Well that's great as a starter but it doesn't work too well as part of a main meal so here's the alternative way of preparing a globe artichoke:

Globe Artichokes

Firstly, prepare a bowl of water with the juice of a lemon squeezed into it. Don't worry about the pips, this isn't to consume, you'll be using it just to prevent oxidation. Keep the squeezed lemon halves in the water. Working fairly quickly, remove the toughest, shell-like outer petals until you get down to the soft, pale heart. Chop off the top to remove the remaining tough bits and trim the green stumps of the outer segments. Keep as much of the stem as you can as that's tasty too but you may need to remove the toughest parts. Chop the heads in half to check for the fluffy centre, which is the part that would form the flower, as you'll need to scoop that out, if it's there. If the head is young enough, like these, it won't trouble you though!

​As soon as you can, pop the halves in the lemony water. If it starts to brown before you've got that far, grab one of your lemon halves and rub it on the surface of the artichoke, that should prevent further discolouration. Strain of the lemon water and place the artichokes in a pan of boiling water. It'll take between ten and twenty minutes to be soft enough to pierce easily with a fork, depending on the size of the chunks. Strain them off again and as they're cooling chop up some mint and oregano. Stir the herbs into some olive oil with salt and pepper and use the to dress the artichoke hearts. Totally delicious... And look! Clean fingers!

We enjoyed the roast veg (OK, yes, I also added some shop bought leeks, carrots, sweet potatoes and mushrooms) cooked with dried rosemary and sage from last season. Served with a few baby broad beans stirred through and heaped on a baked potato (speaking of which, I should probably write a new potato blog soon!) with a dollop of broad bean houmous and sides of lettuce and artichoke. 
Yummy! A grand total of no less than ten home grown ingredients in that meal and a fridge full of prepped veg to see us through the next couple of days to boot. There's so much you can do with next-day roast veg that I'm never shy of quantities when I'm roasting! 

​
As I mentioned in my last garden update it's been a tough year for the garden. From inclement weather to nibbled crops, it seems Nik's just overcome one challenge and another presents itself. There's been no shortage of hard work in cultivating even a modest haul of veg this year but dinner this evening showed just how much that work has paid off.

Of course I could also talk about the rhubarb and gooseberry fool served with strawberries for dessert...

​But that would just be showing off now, wouldn't it!?
Prepped Veggies
Roast Veggies
A Fine Feast
0 Comments

Elderflower Water

29/5/2024

1 Comment

 
A few weeks ago I shared the simple technique of using water to harness the benefits of cleavers and we've been drinking quite a bit of it here, often additionally flavoured with a sprig of mint. Recently, the elder has started flowering though so it seems we're moving onto elderflower water to keep our thirst quenched as we move into the summer!
Elderflower is traditionally used to treat all manner of respiratory ailments, from asthma to colds and even allergies. I'm lucky not to suffer but a daily dose of elderflower is said to keep hay-fever at bay. Topically, it can be used to soothe sensitive skin.

Elderflower cordial, is a well known and much loved summer drink but not so many people seem to know that it can be equally enjoyed in a less sugary way! Simply pop a few washed flowers into a bottle of water, give it a bit of shake and let it sit for half an hour or so for a delicately floral, refreshing glassful of elderflower benefits! The flavour intensifies the longer you leave it, of course. Do refrigerate it if you're not drinking it straight away. You can top the same flowers up a couple of times but start again as soon as you notice any brown areas or deteriation on the flower heads. You can drink it on its own, with a cube of ice, or with a squeeze of lime works well too and if you really do want to sweeten it, I'd suggest a little splash of apple juice might be just the ticket!

Enjoy! Xx
Elderflower Water
1 Comment

Quick Radish Pickle (Quickle!)

11/5/2024

0 Comments

 
Hooray, the radishes are here! Though it's been a strange, cold, wet, spring, we're finally enjoying some dry, warm, sunny weather here in the Tanat Valley and the first bites of Nik's carefully cultivated crops are also beginning to make their way to our plates. We're had some lettuce, some cultivate sorrel, some pea shoots... and now we've got radishes! These delightfully cheery, rosy, crispy, peppery little roots are delicious in salads, eaten as soon as possible after you've plucked them from their little beds, but I also really enjoy pickled radish. I think I first discovered it when I was in Japan, it's often served as a little side dish with meals or as a snack. You might think pickling is a long, slow process and for sure, it can be... but I'm here to introduce you to the wonder of the quick pickle, otherwise known as 'quickle'!

I've occasionally indulged in cooking that takes a full day in the kitchen but quite frankly, though I love cooking and I especially love cooking nourishing, tasty food for people I care about; I also love doing a whole heap of other things so these days I like to keep my kitchen time to a respectable minimum required for a non-processed, balanced diet.
Fresh Radish
Radish Quickle
Happily, I've found all sorts of ways to make good food, fairly quickly; and this is one of them! To make radish quickle, simply pick (preferably from your garden but maybe from the shop!) an average bunch of radishes, that's fifteen to twenty medium sized. Give them a good wash, top and tail them and slice them as thinly as you can. If you're brave enough, the slicing side of a box grater will do well, but mind your fingers! Simply pop your sliced radish into a jar with cider vinegar, warm water, sugar and salt (see gallery images for my notes on quantity). I also like to add some dried dill and a bit of fresh ground black pepper. Some recipes will suggest you can leave it for an hour and that will be your quick pickle, but for my very own Radish Quickle I like to leave it 2 to 3 hours. It's still quick enough that you can make it after breakfast in time for lunch but all those lovely flavours just get a tickle longer to do their thing. Never the less, if you're in a hurry, an hour will do and you'll find the vinegar solution turns a gorgeous pink colour as the radishes become gradually pickled. Serve it with salads and sandwiches, or simply as a tasty little side-snack, and enjoy it while it lasts!
0 Comments

Candied Violets

1/5/2024

0 Comments

 
Violets
I realised recently that I may have given the impression foraging is all green and, well, soupy. So, to remedy that, here's a celebratory May Day post of a sugary, purple nature! May Day, or Beltane, is usually celebrated on the 1st of the month, though this year lunar Beltane was actually just over a week ago on the April full moon. It's a joyous festival of fertility and new life, and I often like to mark it by gathering little wildflowers for a nature shrine to give thanks for the new growth, the coming summer, and set intentions for all that will be fruitful in the next seasons. It's traditionally the festival of maypole dancing and leaping over bonfires but I'm contenting myself with something a little more sober this year and since the may blossom (hawthorn) is coming out ever so tentatively in this cold spring, that seems entirely appropriate! Thankfully, the local wild violets are in business despite the chilled start to the year and we enjoyed gathering them on our morning walk. ​
You might have encountered palma violets; little sugary tablet like sweets, pale purple, in a roll. They always remind me of my gran! If you've ever had them, you'll remember the subtle, floral flavour. I'm not going to pretend homemade candied violets will taste quite like that and the scent of the wild flowers can be a bit hit and miss. If you've got cultivated sweet violets in your garden, you're more likely to get scent and flavour but for me the main charm of these delicate dainties is their beauty. What a delightful way to celebrate the spring! I try and avoid refined sugar as a rule and most of my biscuit and cake making is the 'healthy' kind that relies on things like date syrup and coconut sugar. I did actually use golden granulated for these little lovelies, however; I'm pretty confident they'd work well with an alternative sweetener, as long as it was a crystallised kind. I also used plant based aquafaba (water from chickpeas or beans) instead of the traditional egg white. If you've not discovered the wonders of this miraculous liquid, I'd highly recommend an adventure in vegan mousse making... But please don't spend silly money on the marketed cartons of the stuff, just spend 60p on a tin of chickpeas and have yourself some garlic mustard houmous at the same time!​
Picked Violets

Candied Violet Making:

Candied violets can be enjoyed as tiny sweets just on their own but they make gorgeous decorations for baking, reminiscent of village fêtes; like bunting for your cakes! They also add an elegant, floral crunch to a simple bowl of vanilla ice cream. They take a wee bit of thinking ahead but they're actually very straightforward to make:
Pick your violets, not forgetting to appreciate how sublimely beautiful they are as you do so! Give thanks to the plant, silently or aloud, however you'd like. I'm sure it makes them taste better if you give the plant a little appreciation as you take the flowers! Do be sure you're actually picking violets. I've noticed quite a bit of ground ivy and speedwell about at the moment, both of which have small, purple or blue flowers so take your spotters guide if you're at all unsure what violets look like!

Lightly wash the flowers and prepare your work space as they dry a little (they don't have to be completely dry, that bit comes later!). You'll need some fine sugar crystals (icing sugar is too fine, I used golden granulated sugar that I ground a bit in a pestle and motar. If you've already got caster sugar, that's would probably do it!

Drain the juice from a can of chickpeas (don't worry, your candied violets won't have a chickpea flavour!) into a small bowl and lightly whisk it with a fork until it's a bit fluffy, it doesn't take long. Remove the violets from their stems and holding the flower at the base, dab the fluffy aquafaba onto the front and back of the petals using a small paint brush. (note to self: invest in a brush for culinary purposes!) now, using a small spoon, sprinkle a little of the sugar on to the wet petals and place the flower onto a sheet of baking parchment. Don't be tempted to speed things up by dunking the flower into either the aquafaba or the sugar; you'll smother the flower in too much of the substance and it'll turn into a sticky mess! Repeat the paint and sprinkle process for each flower then set them aside in a warm dry place for 24 hours to crystallise. You could move this step on a little faster if you have a dehydrator, or by putting them in an oven that's been heated to no more than 100°c and then turned off!


When they're completely dried, you can gently peel them off the paper and store them in an air tight box. They should keep quite well but they're so tasty, I'd recommend enjoying them as soon as possible, as an offering to the (slightly late) spirits of spring and the (hopefully not too delayed) goddess of summer! ​
0 Comments

Sorrel Soup

13/4/2024

0 Comments

 
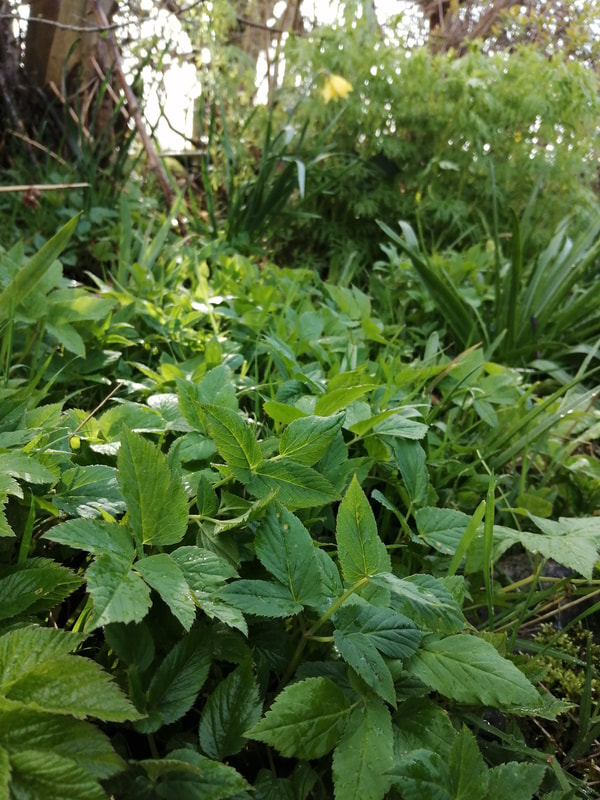
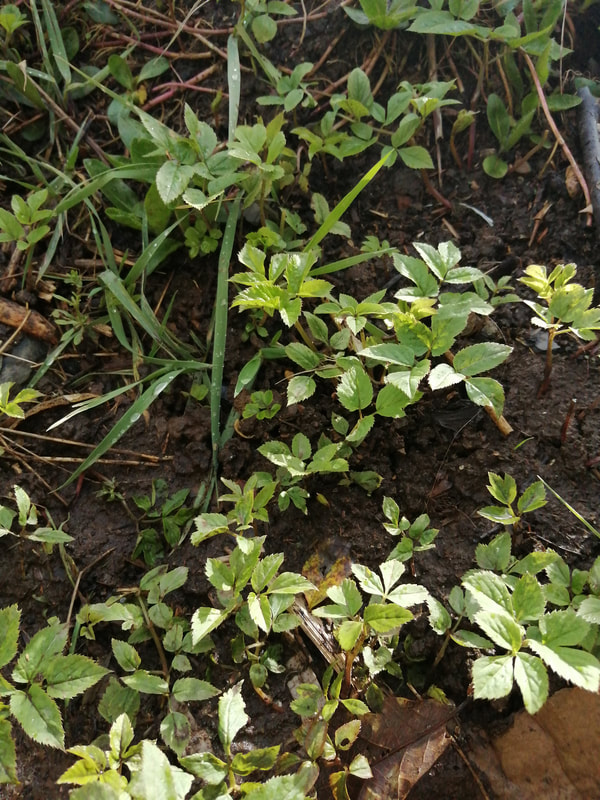
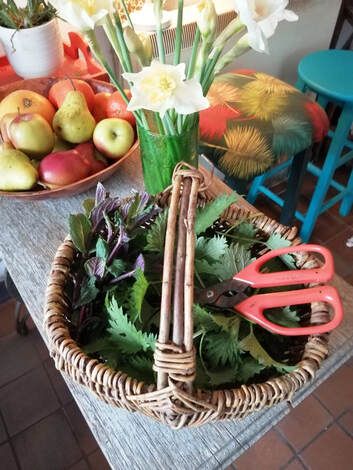
There's so much burgeoning growth in the hedgerows at the moment that I can't quite believe my luck and it seems like there's just one new plant after another unfurling itself and begging for a forage in recent weeks!
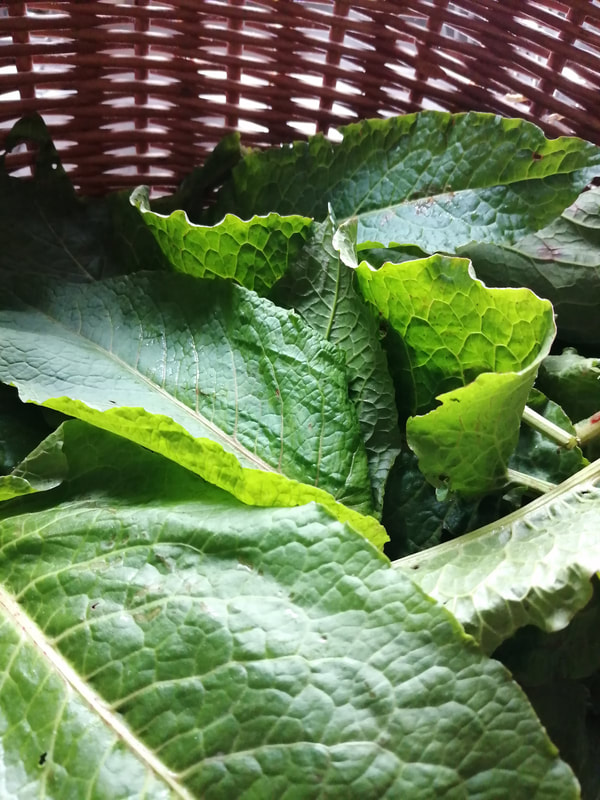
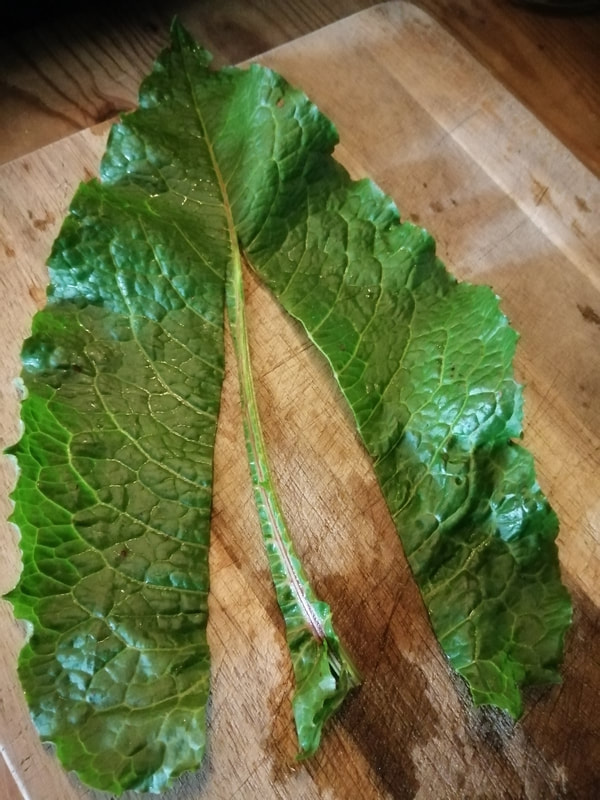
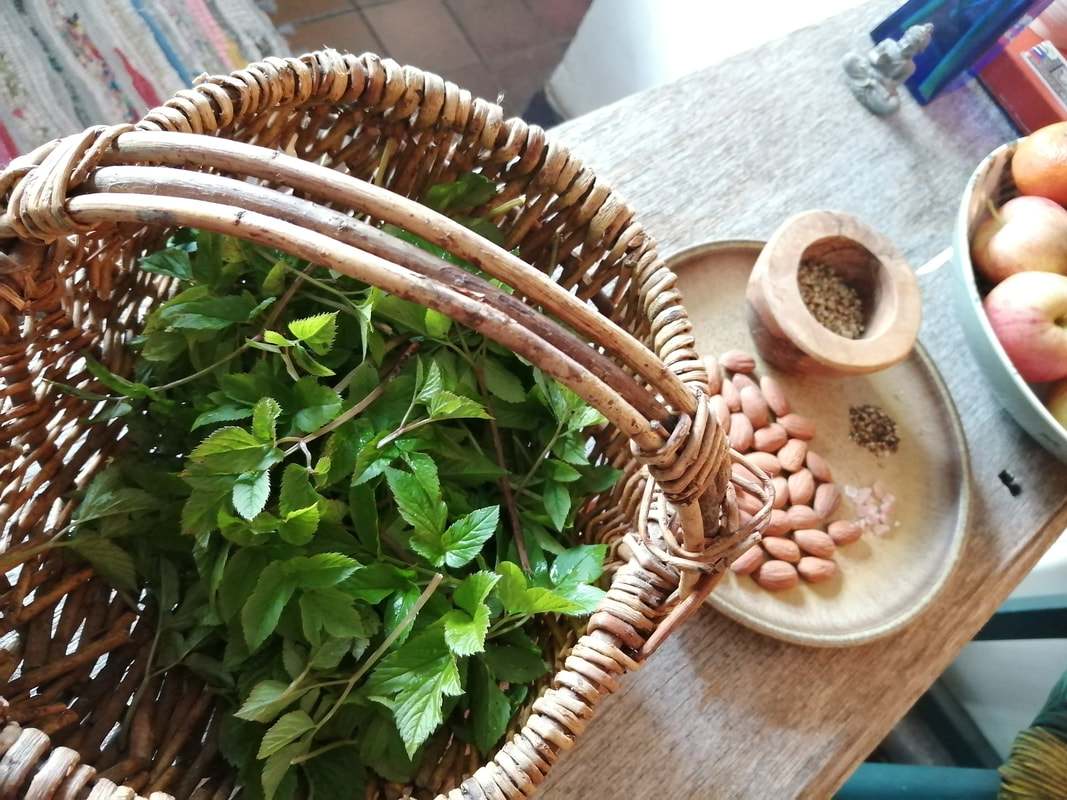
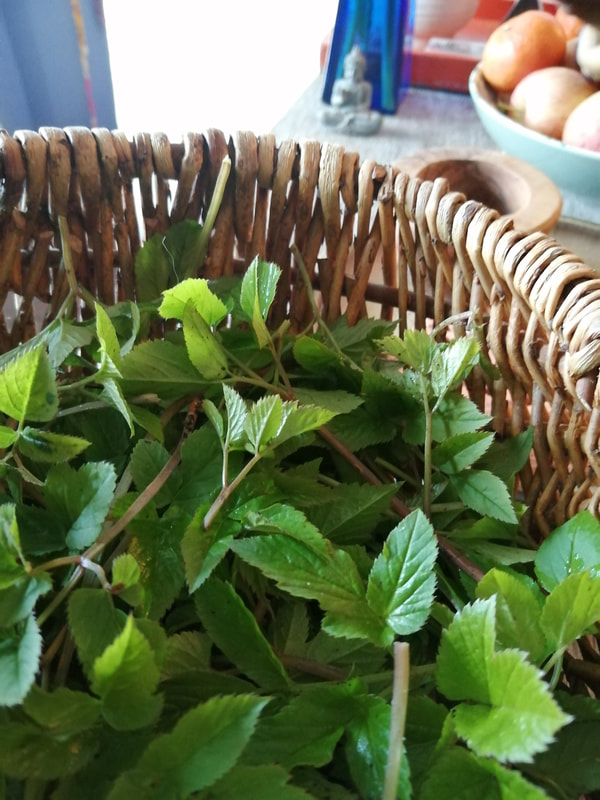
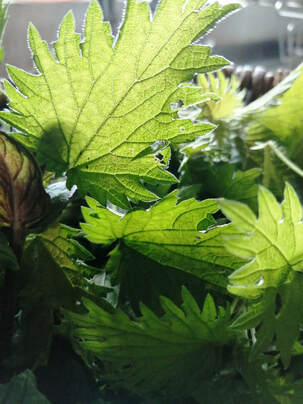
Todays freebie was a bundle of the thick, lush sorrel leaves that seem to be springing up everywhere this week! My first memory of knowing sorrel as a food source was when my gran made sorrel soup for us as a starter one Sunday lunchtime. She wasn't much of a forager and I seem to recall she bought it at the local veg market thanks to a Delia Smith recipe! I'm pretty sure it's a popular Eastern European dish and I think sorrel features more in French cooking than British, which is strange since we have it in such an abundance! It's from the same genus as dock (remember that on your nettle stings!?) and can generally be used a bit like spinach.

As with so many plants, when you're foraging, aim for the youngest, freshest leaves which are less fibrous and have a subtler flavour. Sorrel is reputed to be high in antioxidants, vitamins A and C as well as being astringent, owing to its high tannin content, which can be helpful in drying up mucous membranes.
Wild Sorrel
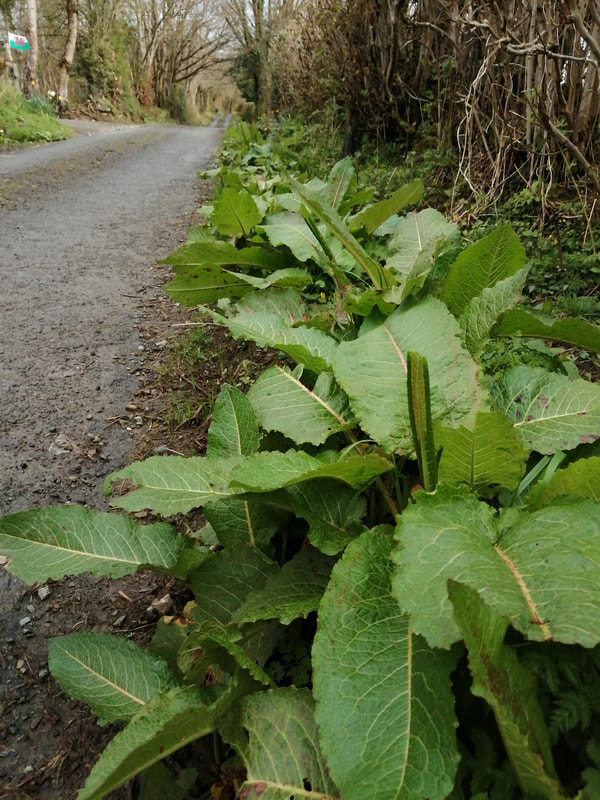
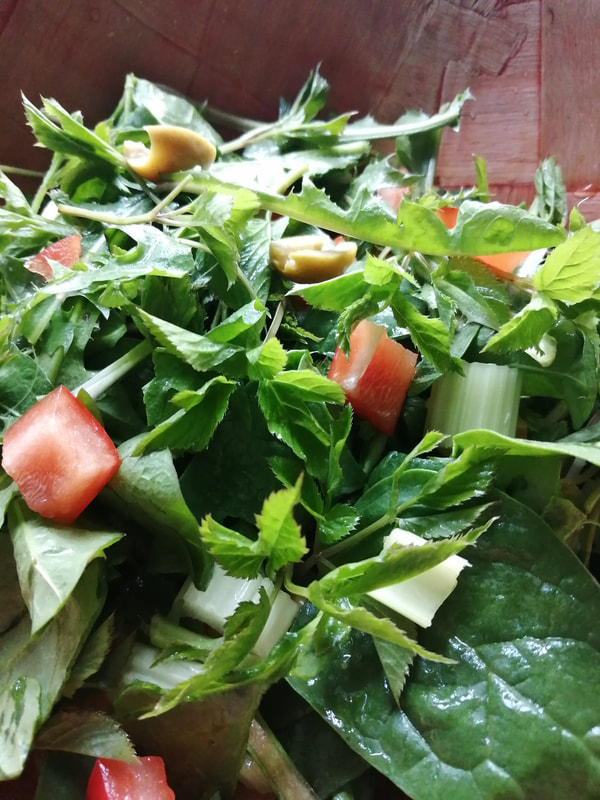
With those qualities (and more!) I think this would be a great dish if you're bouncing back from one of those spring colds that seem to be rampaging about at the moment! It's got a distinctive flavour, slightly more like kale or cabbage* than spinach, a little bit lemony, quite sour and slightly bitter. There are, of course, hundreds of sorrel soup recipes out there but here's my version!
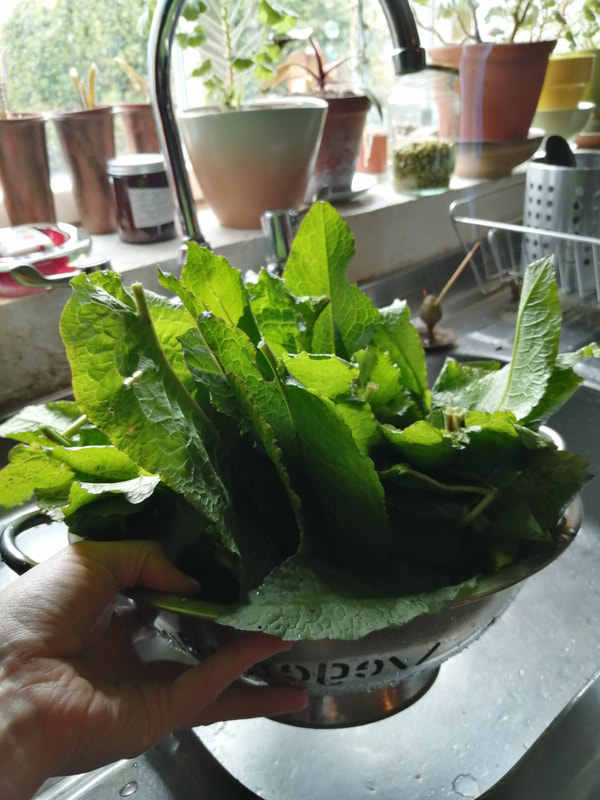
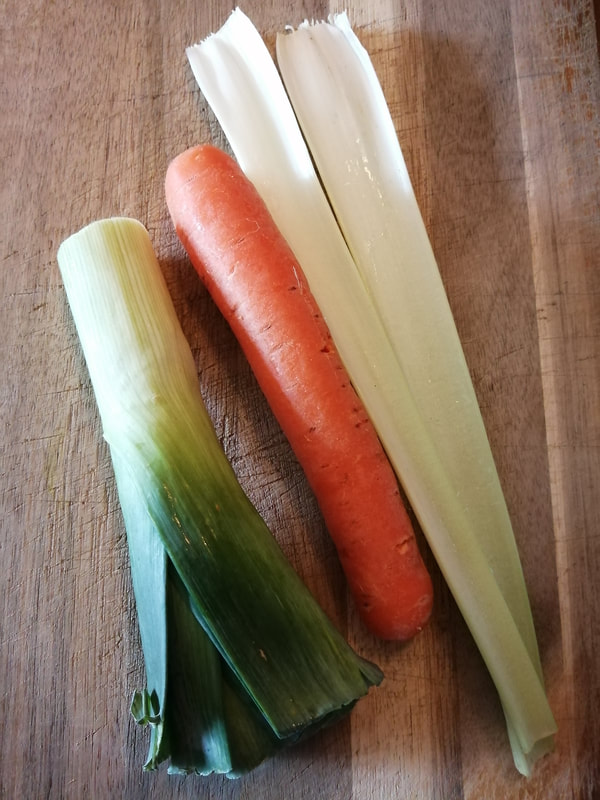
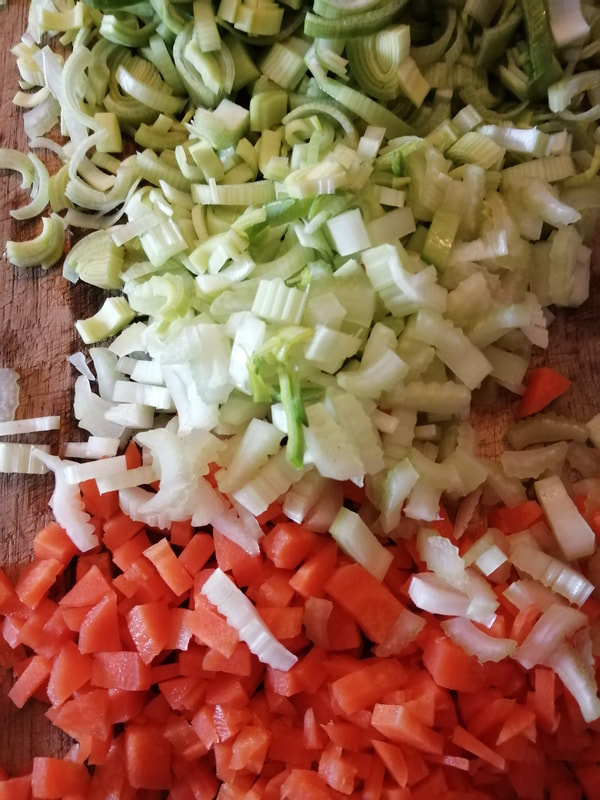
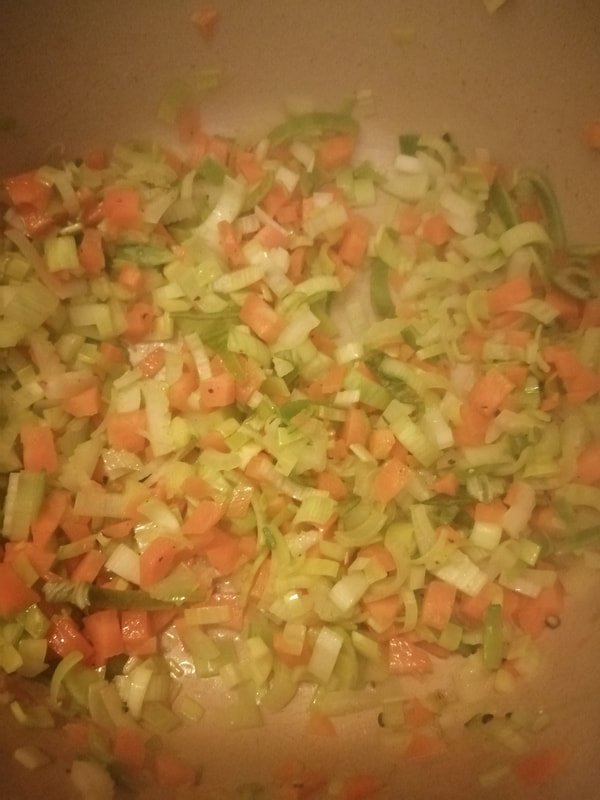
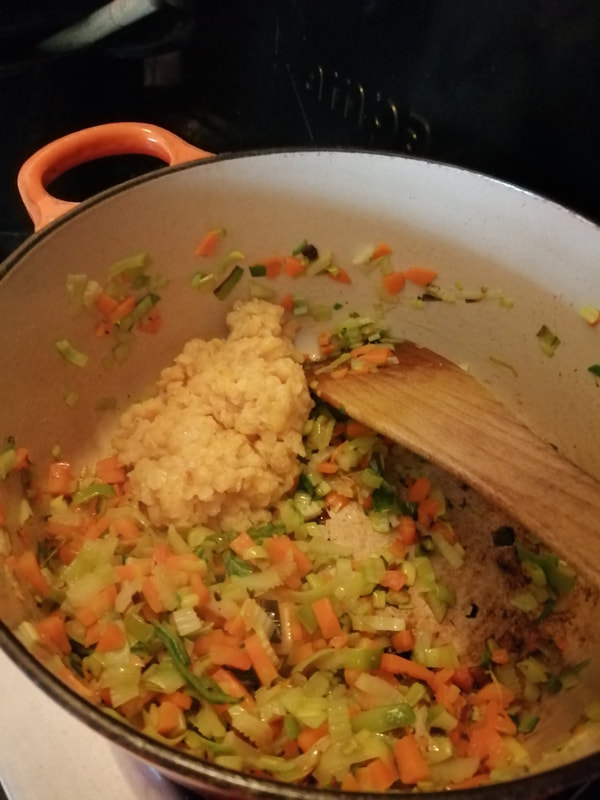
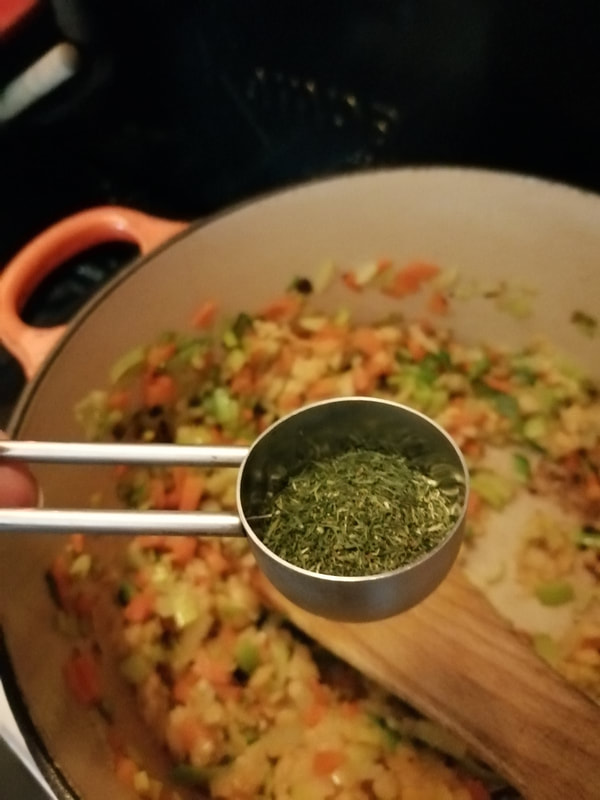
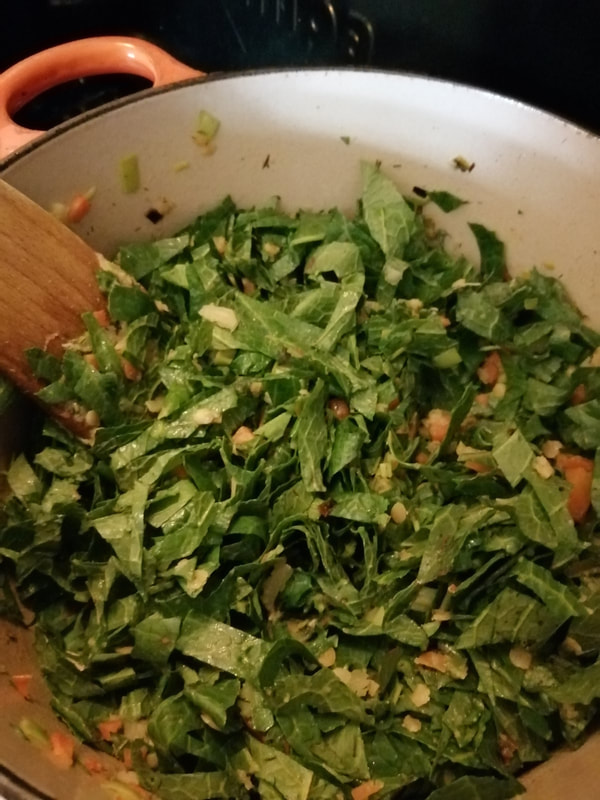
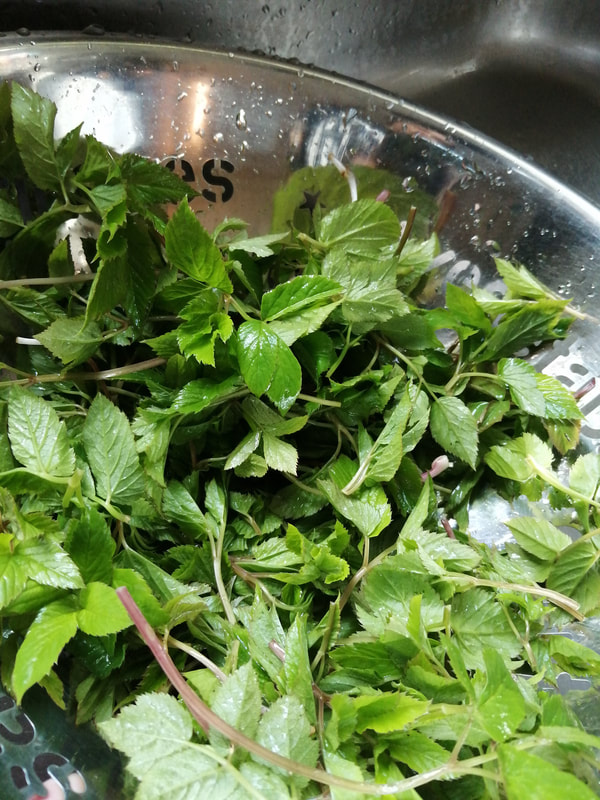
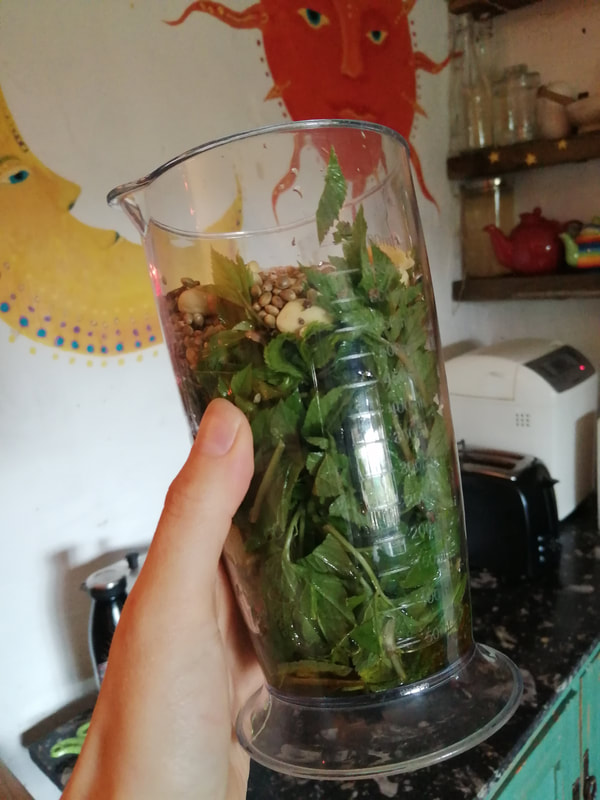
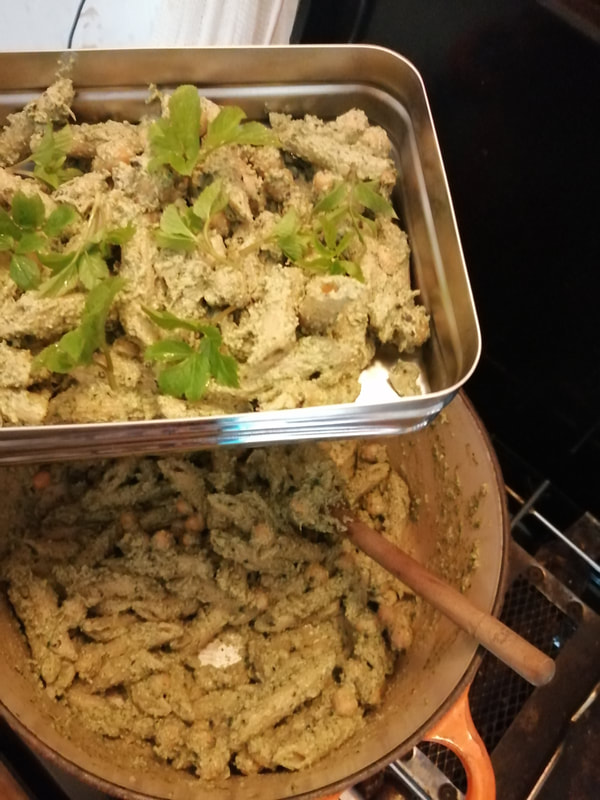
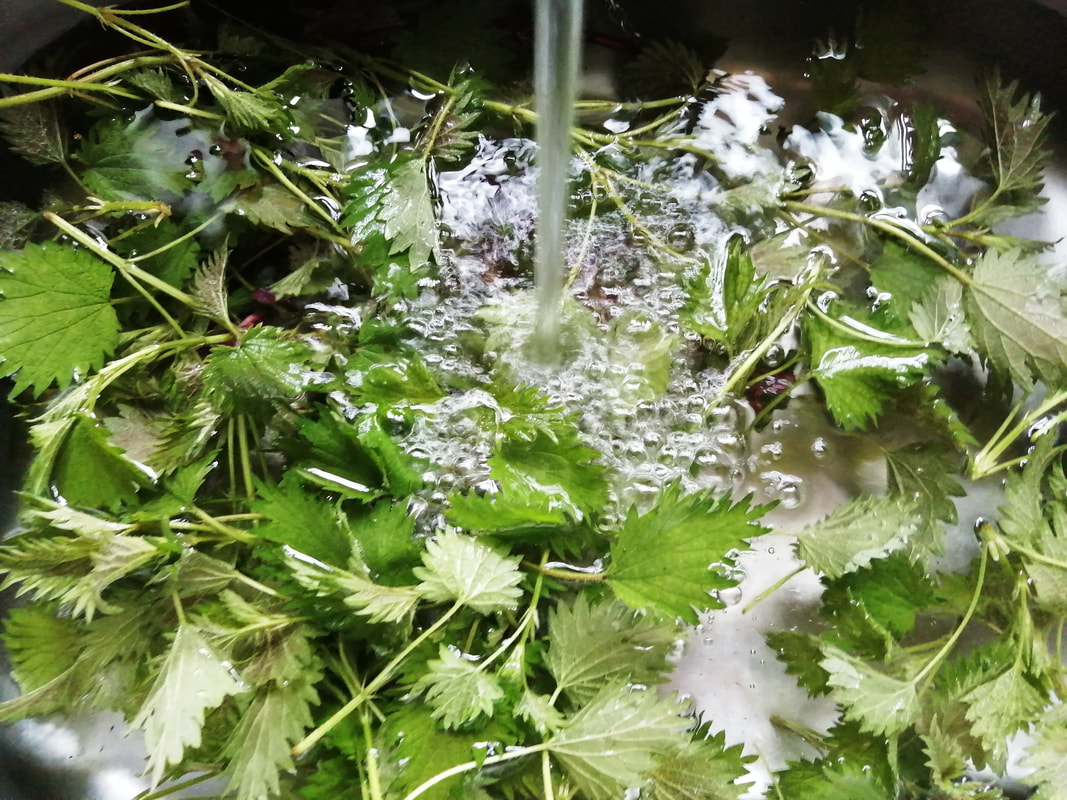
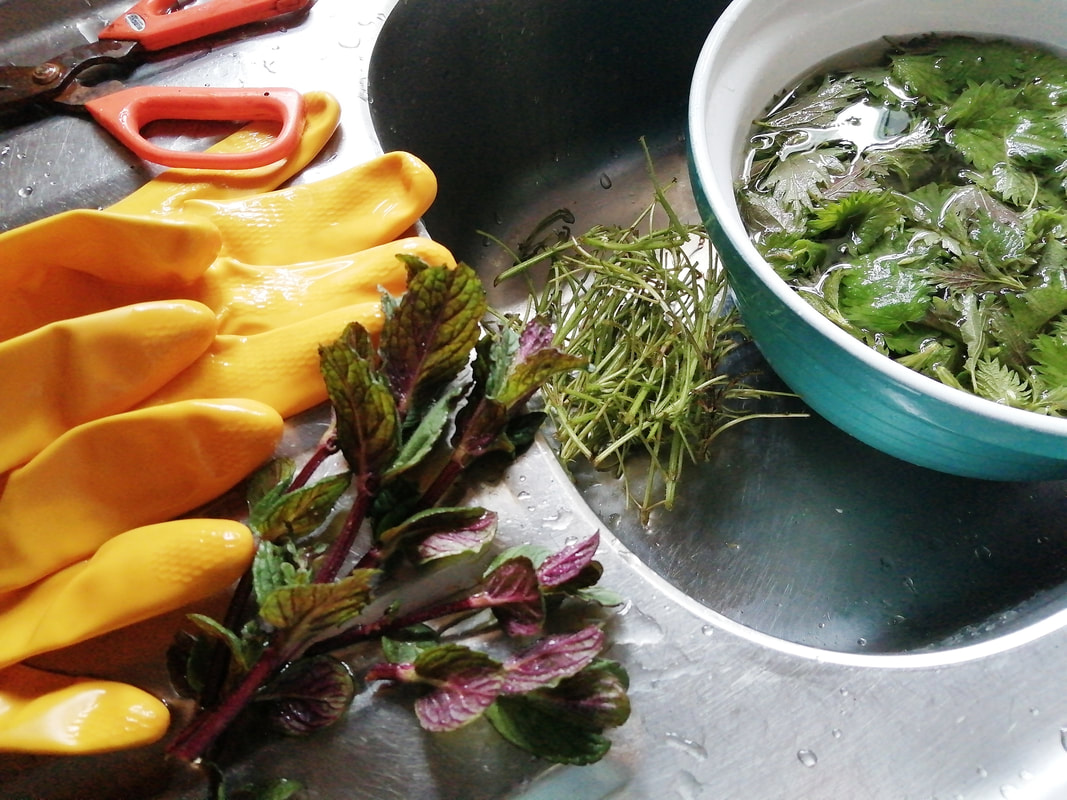
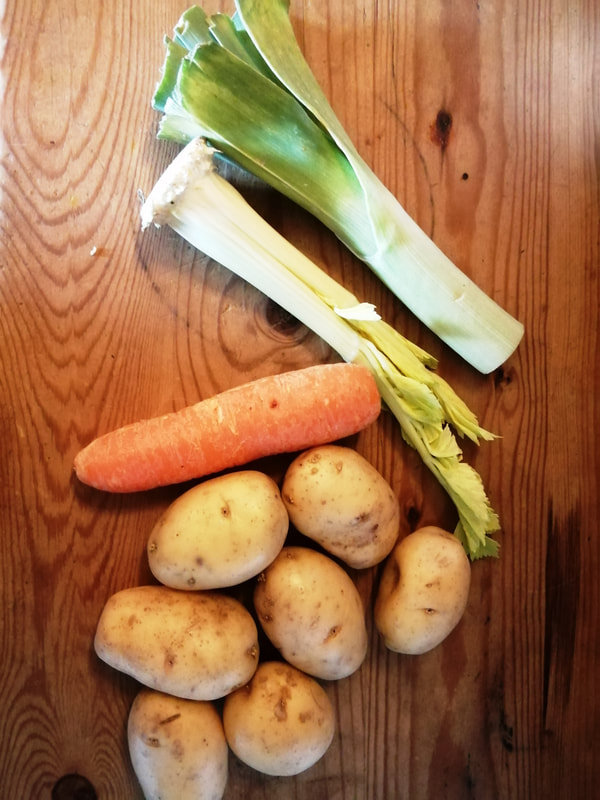
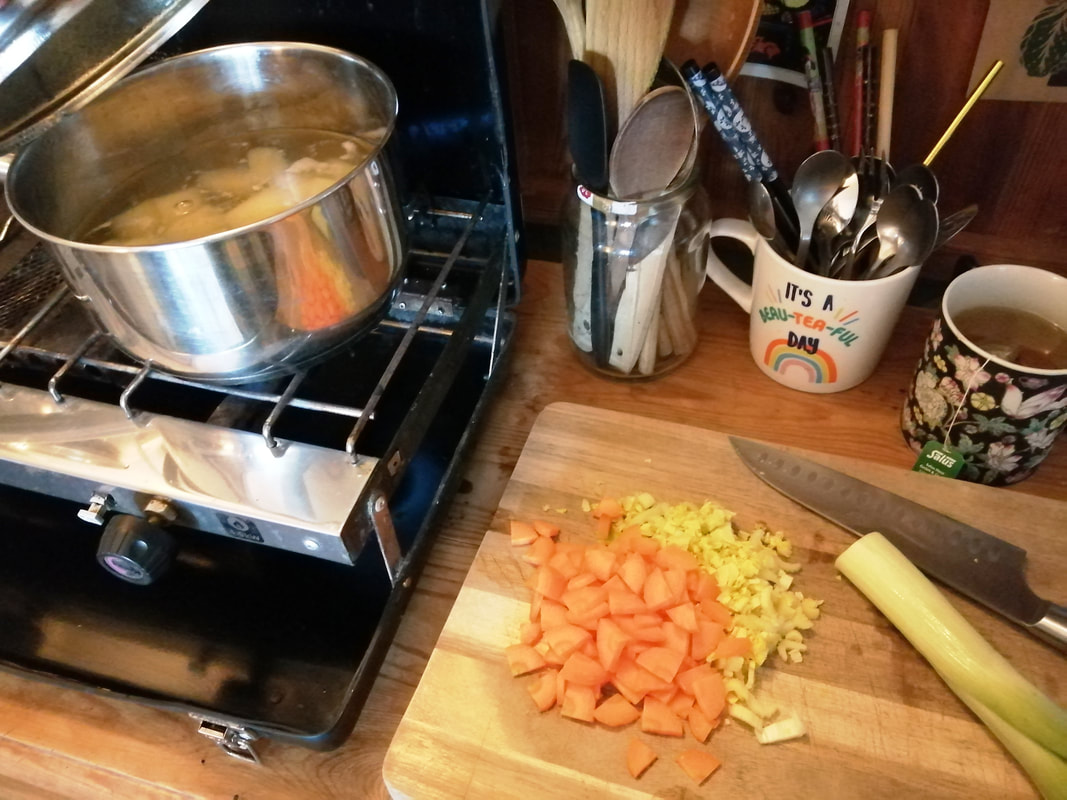
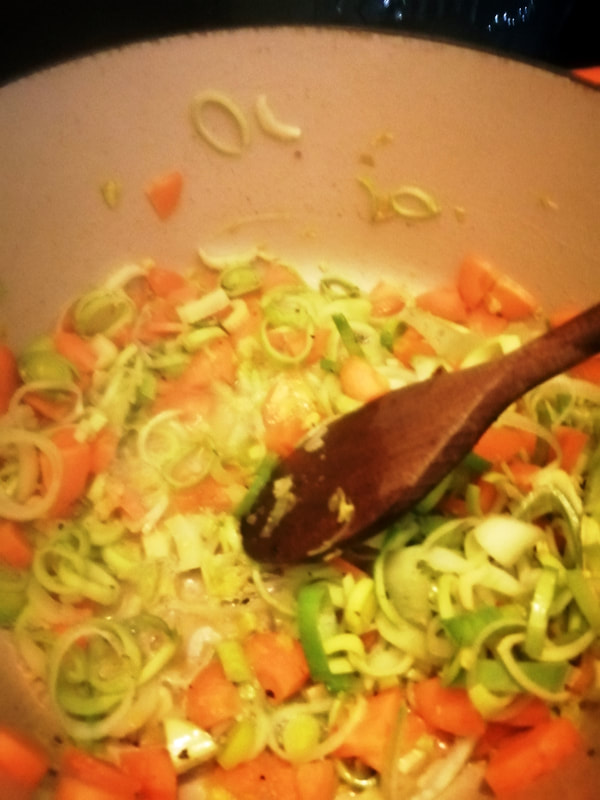
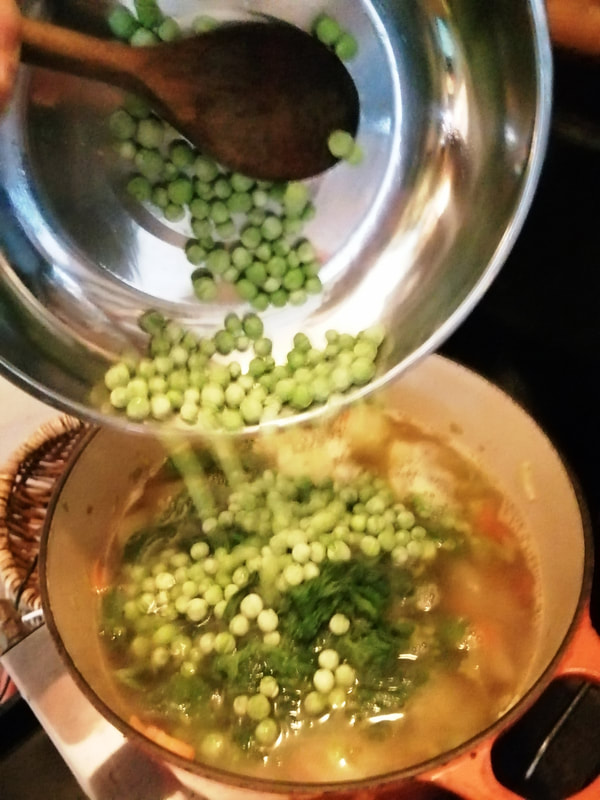
Sorrel Soup Visual Voyage:


​​Starting with a favourite base of finely chopped celery, carrot and leek (you'll notice I don't cook with onion or garlic, I don't seem to digest it well as I've got older but feel absolutely free to use it as you'd like, wild garlic would probably be amazing!), fry the finely chopped veggies off in a little cooking oil before adding salt, pepper, and about a cup of cooked red lentils. Many soup recipes use potato as a thickener but I prefer red lentils, which blend away to a thick paste with an unobtrusive flavour just like potato, but give the soup a boost of protein at the same time.

Add half a tablespoon of dried dill and let it cook for a bit. Meanwhile, you can trim the woody stems from your (well washed) sorrel leaves, though very young leaves may not need it. You can then slice it finely much like you would prepare kale.

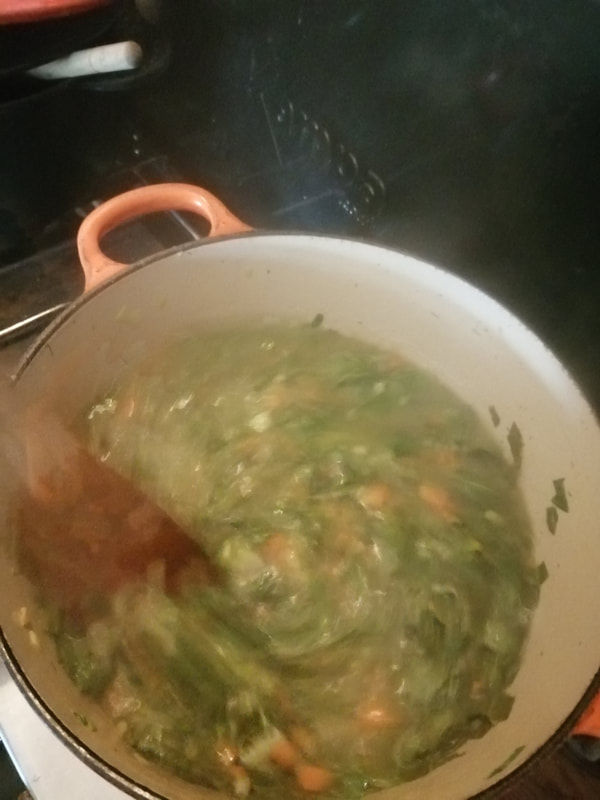
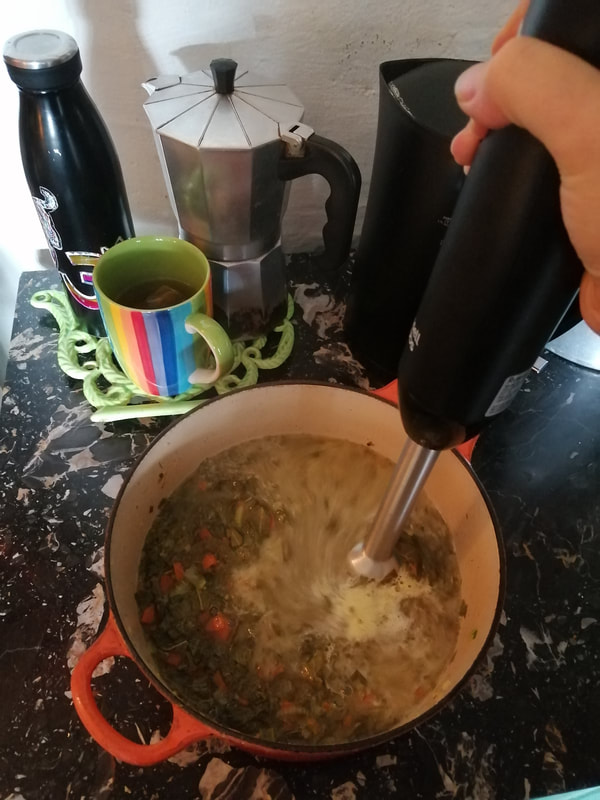
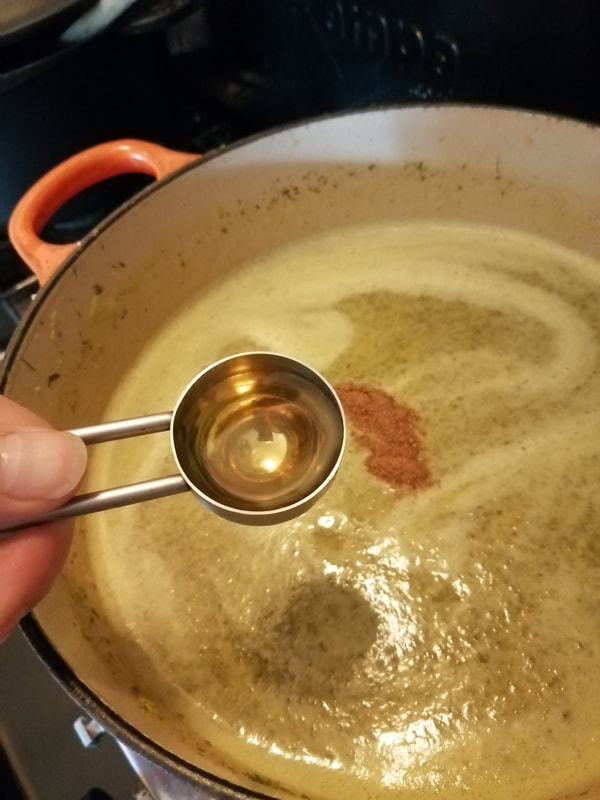
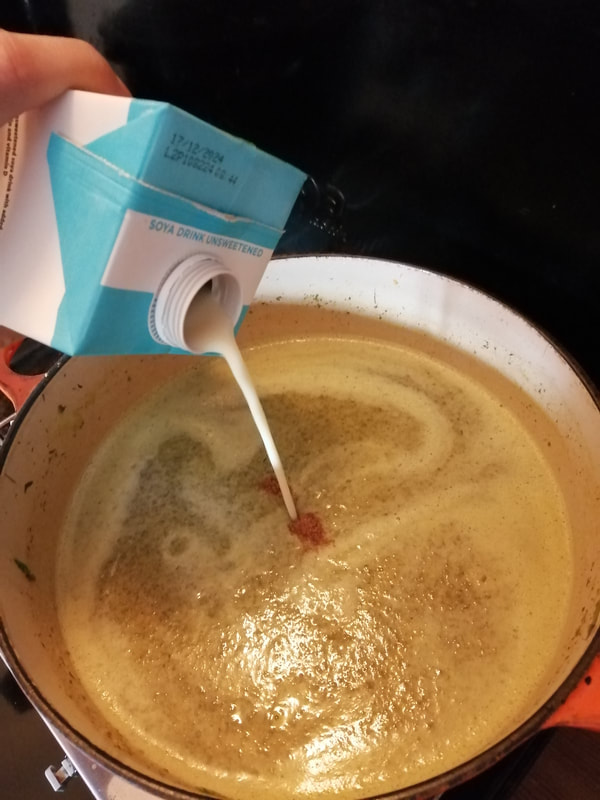
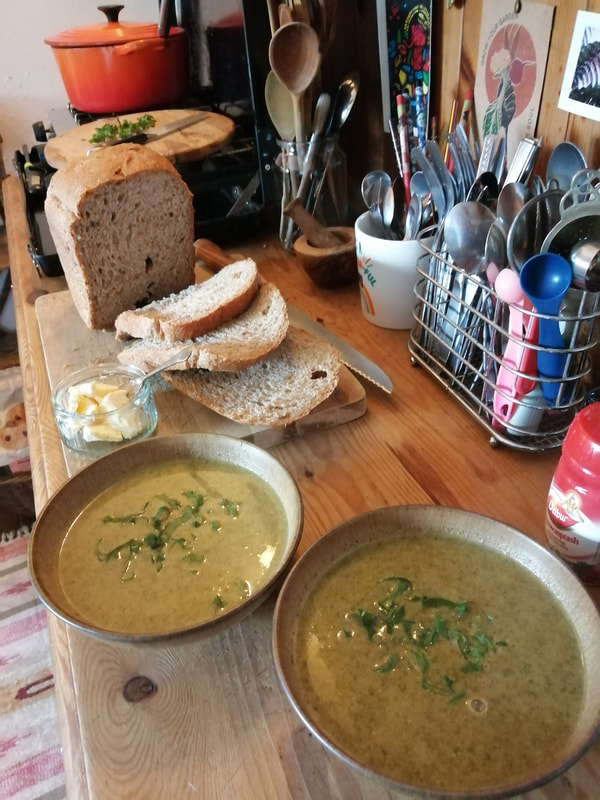
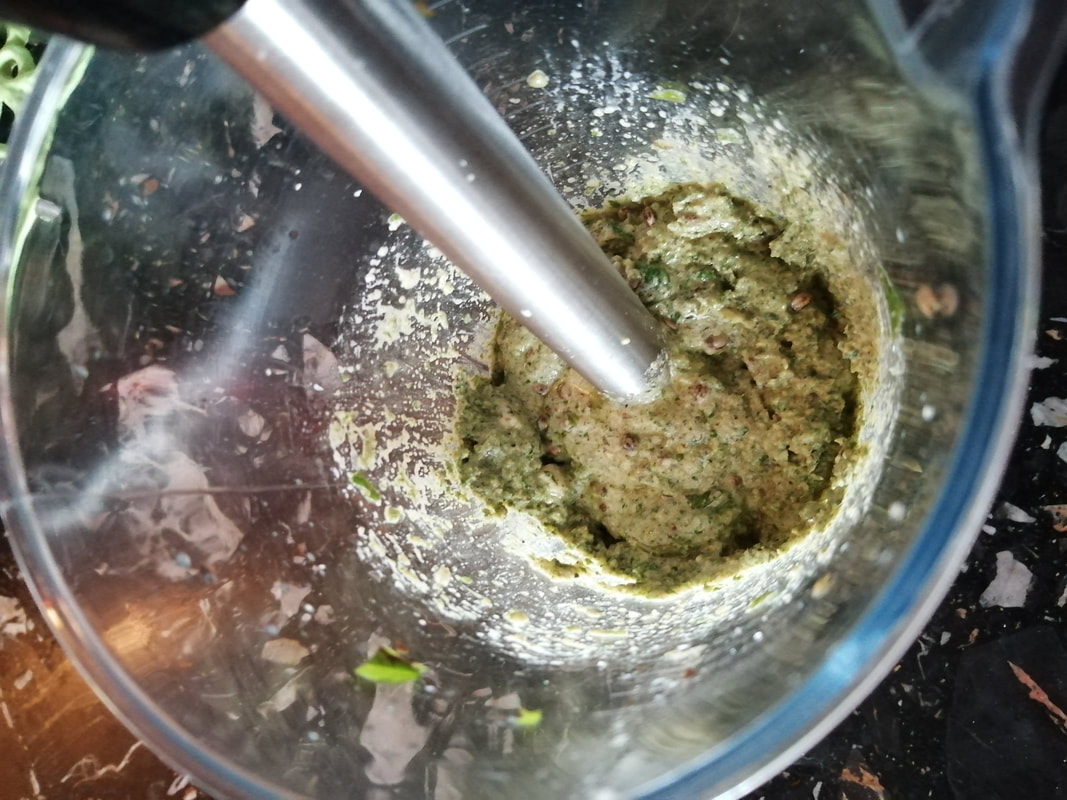
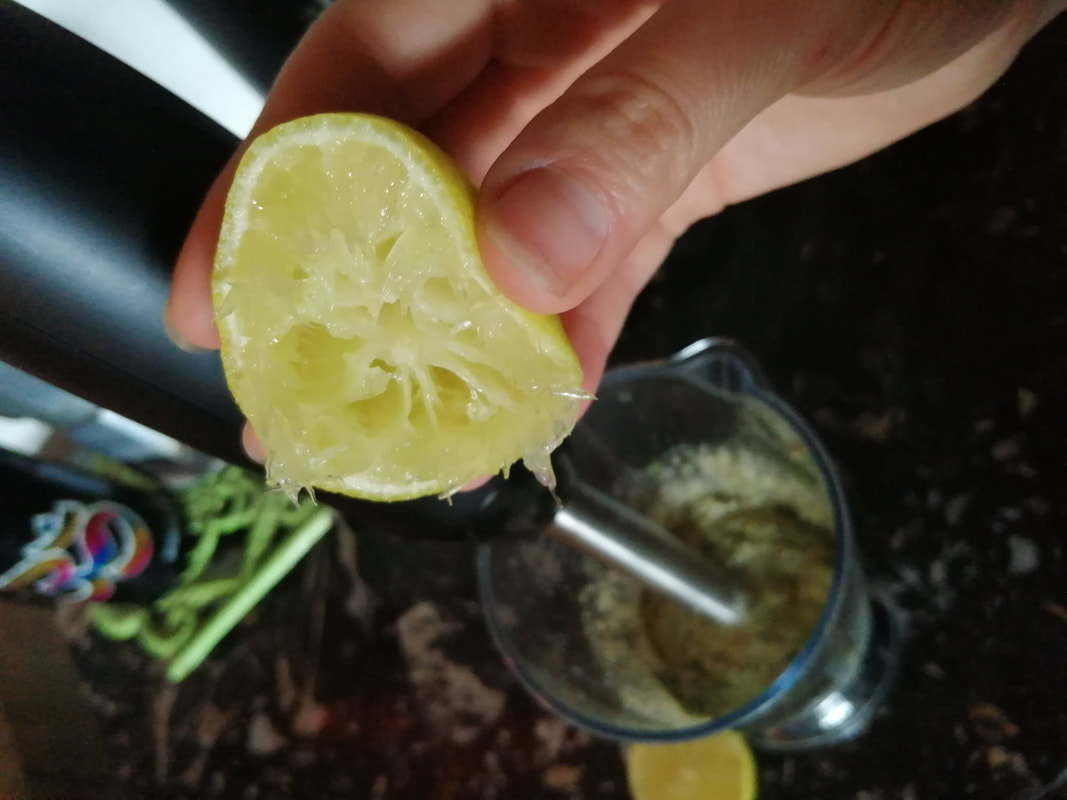
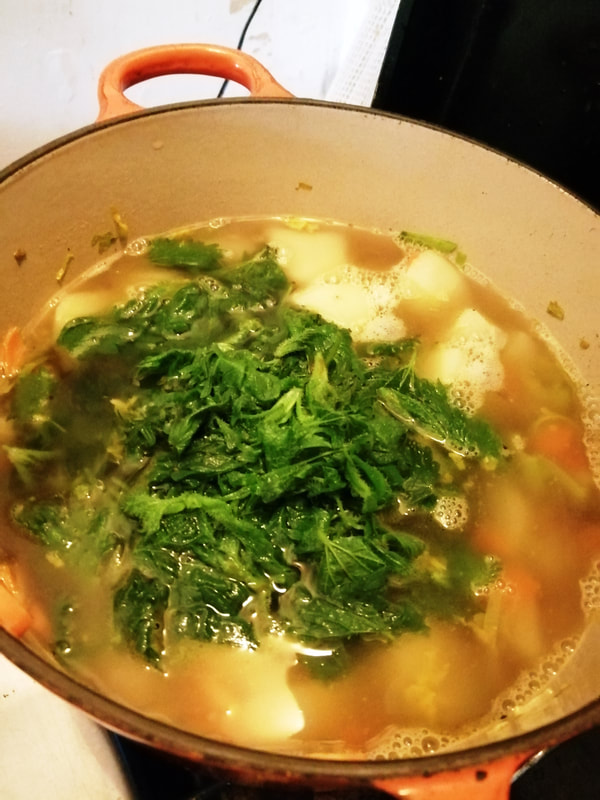
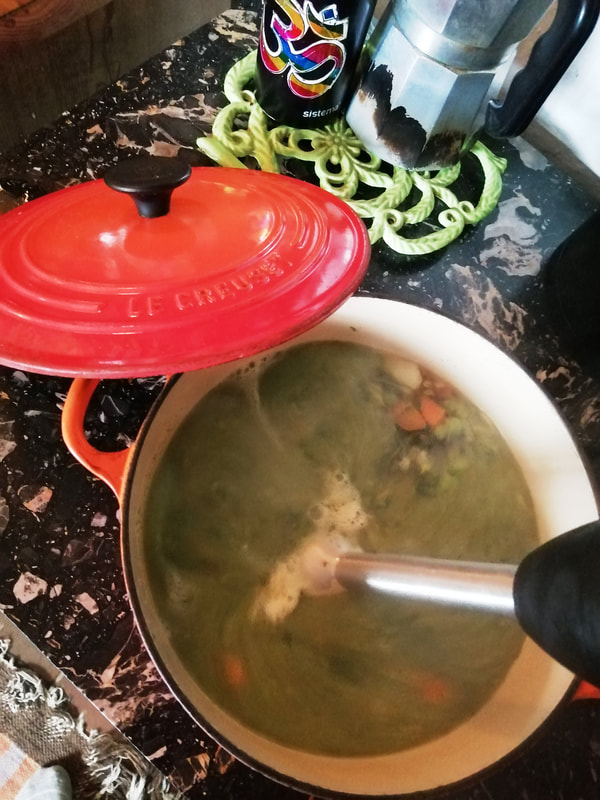
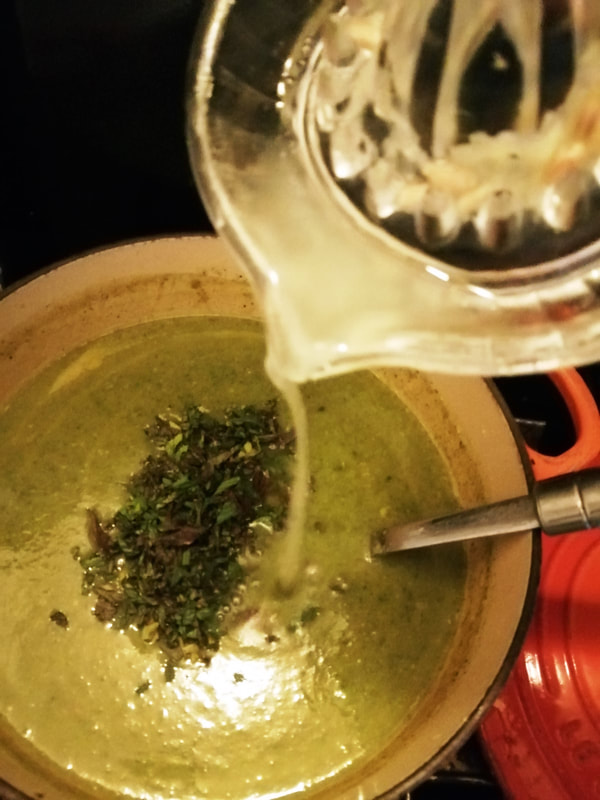
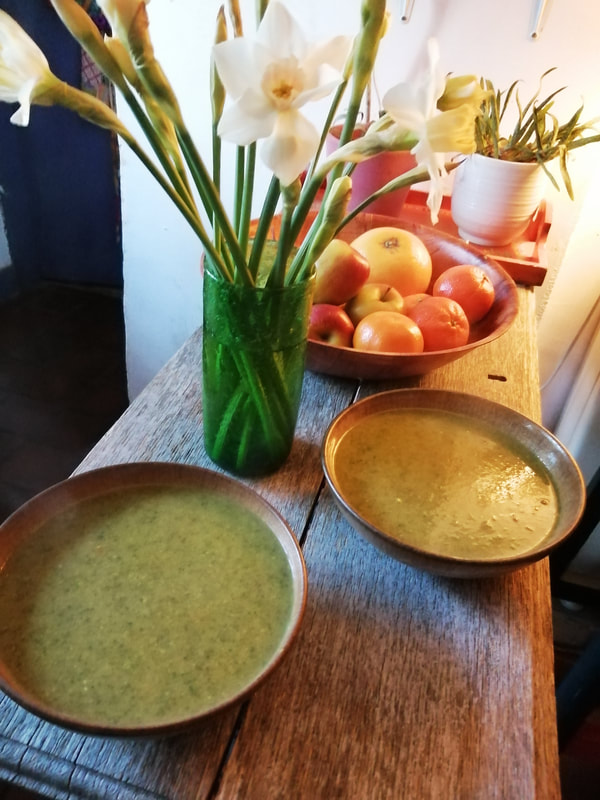
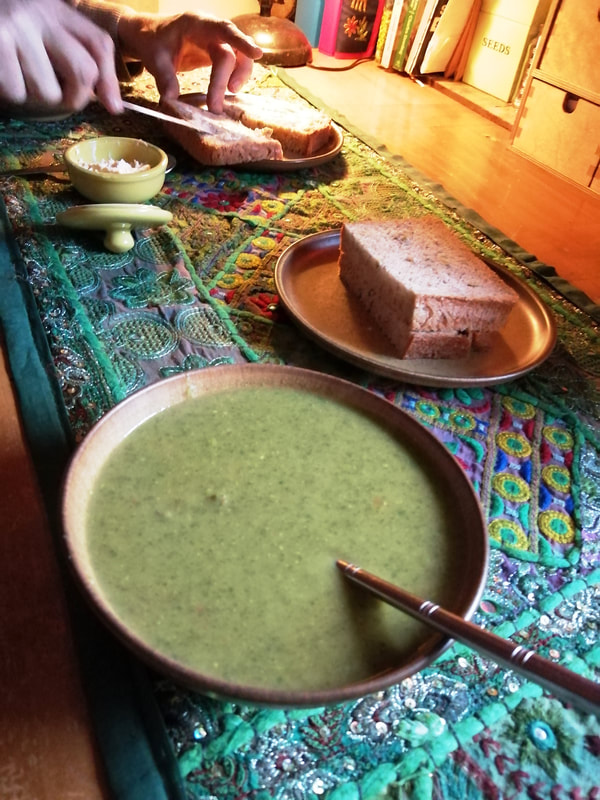
​Wilt the leaves into the cooked veg base then add freshly boiled water. Turn off the heat and let it sit a little. Once it's cooled off, blend it up (I favour the good old stick blender, who wants to wash a food processor jug?!) and finally add a little nutmeg, a spoon of cider vinegar and a gentle glug of soya milk.

​You can make this in advance, just reheat it gently and don't let it boil (the milk might curdle... Don't panic if it does, just add a little more and whip out the blender again, that should re-homogenise it) and serve with finely chopped leaves to garnish along side hunks of warm, fresh bread. De-lish!

* Sorrel can also have the same effect on your tummy as cabbage... you have been warned! ;-) xx
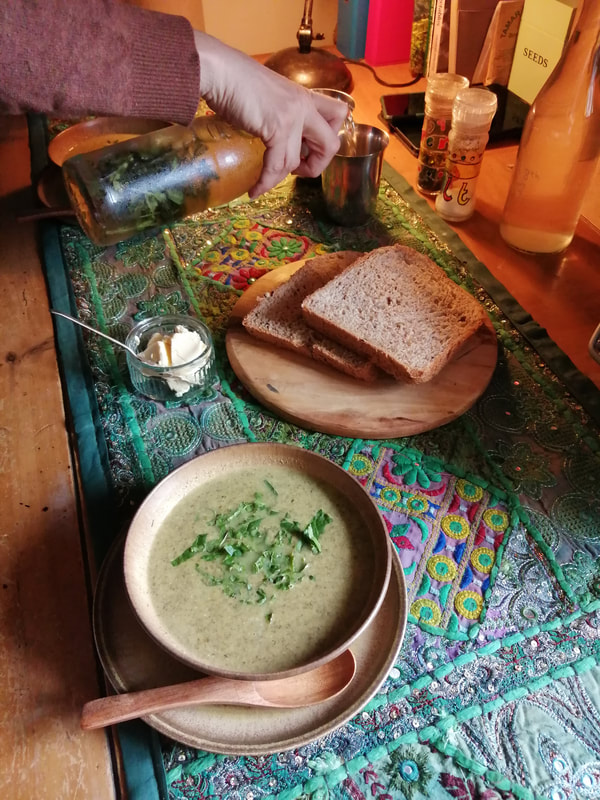
Sorrel Soup
0 Comments

Goose Grass Juice!

11/4/2024

1 Comment

 
A while back I mentioned cleavers as a seasonal ingredient to my 'spring tonic tea' but I've been enjoying it as a refreshing, soothing medicine all on its own in the last couple of weeks, so I thought it was worth revisiting.
Goose Juice
I think I listed 'sticky weed' and 'sticky willy' as alternative names for cleavers but I recently found that it has yet another moniker that it earned when being used for feeding geese and chickens; goose grass! The juice is traditionally used as a cleanser, flushing out the urinary system with its diuretic function as well as supporting the lymphatics, which is just what you need at this time of year; a fresh start and a boost to the immune system! You can make tea, juice it in a high speed blender or add it to smoothies but I've discovered that simply giving it a shake in a bottle of water and letting it sit for a while is a really easy way of producing a subtly refreshing morning drink. I think it tastes a bit like cucumber, Nik's not sure about that comparison but still enjoys it! It's also supposed to be a good treatment for skin conditions such as eczema and we've found the bright green sap useful for taking the itching out of his sunlight induced hives (yes, already, at this time of year, poor sensitive soul!). I've also used it successfully to soothe nettle stings when out on a (careless) forage! If you want to give it a go, simply roll up a handful and rub it between your flat palms until you extract the juice then apply it topically. Of course, if you've any history of plant allergies or hayfever please take care of yourself and use with caution! X

1 Comment

Water Kefir

10/4/2024

0 Comments

 
We're all about the local, foraged and home grown here and you can't get much more local or home grown (possibly even slightly foraged!) than this treat of a drink. We enjoy it with meals or on its own, sometimes flavoured or diluted with something else but mostly just as it comes. It's a tasty drink in its own right but I have also been known to use it to soothe my stomach in times of digestive distress. I also consider it a preventative measure to keep my gut in good health, as well as a remedy for when things are a little out of balance. This is water kefir, a yeasty*, symbiotic bacterial culture of an indeterminate composition, depending upon your source, and it lives on the shelf in the kitchen above the bread machine. It requires minimal care and interaction, in fact I've come to the view that it rather thrives on neglect. It's certainly an introvert. You may have encountered kefir as a fermented, probiotic milk drink (which, incidentally, it's perfectly possible to make with plant milks), and this is its watery cousin. Personally, I prefer it as I'm not a great milk drinker and once you've got a healthy culture it's almost free to maintain (bar the cost of some sugar and the energy to boil some water). 
Kefir Jar
I once had a kombucha scoby (that's another kind of bacterial colony that likes to drink tea instead of water or milk), which looked like something from a sci fi film or the shelves of the Huntarian collection but was also an enjoyable way of introducing some healthy bacteria to the microbiome. It was pretty easy to care for but I know of no fermentation** easier than good old water kefir. There are a plethora of instructional videos and web pages online that will instruct you in the correct care of kefir, but I inherited my knowledge as I inherited my culture and with a little bit of trial and error, as well as the occasionally neglectful 'oh, great, I didn't kill it!', this is how I have learned to care for ours. If you don't know someone who can gift you some kefir 'babies', you can order them online, in which case I would suggest following the instructions that come suited for your particular culture. But here's what I do, to give you an idea if you're considering introducing kefir to your home brew options! 

​To begin with, there are a couple of basic principles I was given when I first started kefir care:
  1. Avoid contact with metal (use glass vessels and wooden or plastic utensils) 
  2. Use boiled (cooled) water only 
  3. It'll take five to seven days to produce something good to drink 

I have since discovered:
  1. Don't use dark brown sugar or molasses; it dies!
  2. Ambient temperature has a significant impact on the rate of fermentation (cool = slow, warm = fast) 
  3. It can actually sit very happily for over three weeks or more if its got enough sugar to eat and it's not in a warm room

In fact, in our cold cottage kitchen, far from the optimistic five to seven days I was first instructed, we now prefer to give it between eighteen days to three weeks, but sometimes I forget and overshoot a bit. However you time it, today was Kefir Day so I thought I'd celebrate with a little article! 

One of the reasons I find it easy to accidentally miss the intended date of bottling the kefir is that I do stick to the instructions I was given about only using boiled water. Of course, to use freshly boiled or even hot water would kill the bacteria, in fact, I guess the reason for boiling it is to ensure you've only got the 'friendly' stuff, so you need to plan ahead at least as far as the time it takes for boiling water to become tepid. Ideally, I do it the night before and leave the water in a covered jug until the morning but I'm just not always that organised! 

You can flavour your kefir by making an infusion at the point of boiling the water. Those dusty old fruit tea bags languishing at the back of the cupboard would work very well, as do ginger and subtle herbs like bay. I've experimented with various flavourings but recently I've decided I just like plain old kefir... You'll want to go through your own process of trial and error with that one! Once the water (or infusion) is cool, it's time to bottle the previous batch. As the kefir cultures all hang out at the bottom, it's quite easy to just pour most of the fermented liquid off the top but I find pouring it into a jug before approaching the bottles is by far the best technique for doing that, else I tend to spill a lot! I don't sterilise the bottles but of course you want to make sure they're good and clean. This is another opportunity to add flavouring by adding aromatic ingredients (such as rosemary sprigs or lavender flowers) to the bottle; but to be honest, I'm not sure how much of an effect that has on the shelf life of the drink and anyway, I like it plain!

When I've (mostly) emptied the kefir jar it's simply a case of dumping six tablespoons of sugar on to the little gelatinous kefir babies in their remaining yeasty soup and then pouring the cooled water straight on top. The lid goes on, I date the jar with both today's date and the rough date I think it'll be ready on and then it goes back on the shelf to be forgotten about for another 3 weeks! I've not yet established how long the bottled kefir lasts once it's been filtered off the culture but that's because we're only really able to make about a litre and a half at the moment, which we've usually drunk before the next batch is ready! Going forward, I'm hoping the culture will grow enough that I'll be able to split it and get a second one on the go. Since we've got a cool kitchen it's not been growing very fast, but I gave it a little extra attention today and strained off more of the cloudy, yeasty goop at the bottom to establish that it has grown a bit over the months I've had it. I'm hoping with a little patience and a few more months we might well be able to stagger the bottlings and add even more probiotic tastiness to our lives!

*If you're treating any yeast infection or have been sensitive to yeast in the past, best not take water kefir. 

**The fermentation process does produce a small amount of alcohol so if you need to avoid it, this isn't for you! Xx
0 Comments

Ground Elder Pesto

6/4/2024

0 Comments

 
Ground Elder
There are few things more wholesome than cooking a genuinely delicious meal from vegetables you've grown, from seed perhaps, in your own garden. But I have to say that cooking a delicious meal from food you've weeded out of your garden to make way for said veggies is possibly even better. My 'to do' list yesterday morning included 'weed herb bed' and 'make packed lunch'... That I managed to do both of those things  in (sort of) one go was incredibly satisfying!

Ground Elder is an absolute scourge here, despite Nik's attempts to smother it into submission with acres of cardboard. It would be a losing battle before I even started to think I could make a dent in it across the whole garden but at the moment I've got a particular interest in keeping the herb bed free of the things that would threaten the optimum development of my poor little newly rooted cuttings. They're already at such a disadvantage thanks to the unseasonably dull, wet weather we seem to have been receiving across the country of late, so it's a good place to start!
We can thank (or maybe blame!) the Romans for introducing this cousin of the carrot to our shores apparently, as they were fond of using it for culinary as well as medicinal purposes. One of it's therapeutic uses is as a poultice for arthritic conditions, in fact it's also earned itself the name 'gout weed'. To eat, I think it tastes a bit like a cross between parsley and celery. You definitely need to select the new leaves not the mature ones though, they're a bit too tough and develop a more pungent flavour that would, shall we say, be an acquired taste!
By far the easiest way to prepare ground elder for the table is to chuck it in a salad, possibly with a few young dandelion leaves for an extra foraged boost. You can also wilt it into pasta like spinach or simply fry it in olive oil as a side dish. I had a little more time though, so here's another foraged, seasonal visual recipe! It's still pretty easy and there's lots of room for tweaking it to meet your preferences and current larder without a trip to the shops. To be honest, I think that would rather undermine the food for free ethos anyway!

So, this is my take on a kind of foraged pesto. I seem to recall that 'pesto' just means 'paste', so whilst there may be no basil, pine nut or parmesan anywhere near it, it's entirely accurate to label it such! As ever, check out the gallery photos for ideas on quantity. First, pick your ground elder shoots, early in the morning if possible, choosing the youngest ones you can. My technique involves ripping a big, careless handful off the top layer then being a little more discriminating with the new shoots. It's not like we really want to encourage strong healthy plants, so that's how I get to justify this as 'weeding' too! 

Foraged Salad
(Mostly) Foraged Salad!

​Give the leaves a good wash, pick out any bits of grass (or just decide it probably won't do you any harm) and set aside to drain. If you're organised (I wasn't) you'll have soaked some almonds overnight but you can speed things up by using boiling water to blanch them. They pop out of their skins in a surprisingly pleasing way, once they've cooled down a little. Chuck a really good glug of olive oil in the container you're using to blend, then add two or three large handfuls of ground elder along with your nuts (I used the aforementioned blanched almonds as well as some hemp seeds), some salt and a bit of pepper. Blend away!

With my quantities and blender, I found it needed just a tiny more liquid but I didn't want to add more oil so I used the juice of half a lime, which I thought also added some serendipitous flavour! Finally, I chucked in a little nutritional yeast as a nod to the traditional parmesan; and that was that!

​Use as you would any pesto, in pasta or maybe with bruschetta. I stirred mine into some wholemeal penne (with some chickpeas for extra protein, which made an excellent pasta salad for my packed lunch yesterday and left enough for us to have today as well, though I added some green peas to that for a flavoursome boost and stirred in a little unsweetened soya milk to stop it sticking.


Fresh ground elder pesto pasta two days in a row and 'weeding' very temporarily crossed off my list of chores! Perfect! Wishing you an equally satisfying foraging-come-gardening adventure this weekend! May your tummy be full and your herb beds clear! With love until next time. Xx
0 Comments
<<Previous

    ​We're Nik and Annabeth. This is Earth Heart...

    Read about the Earth Heart Project here...


    Picture

    ​Reaching Out?
    [email protected]

    Categories

    All
    Buddhism
    Foraging
    Herbs And Healing
    Land
    Meditation
    Organic Gardening
    Placemaking
    Poetry
    Seasonal Eating
    Seasonal Festivals
    Sitar
    Upcycled Crafts
    Vegan Home Cooking

    RSS Feed

Powered by Create your own unique website with customizable templates.